


With many people at home during self-isolation, now is the perfect opportunity to learn a new craft and get organized around the house. Crafting is a great way to relax, relieve stress and have fun. Below, I have listed three inexpensive craft projects you can enjoy making at home.
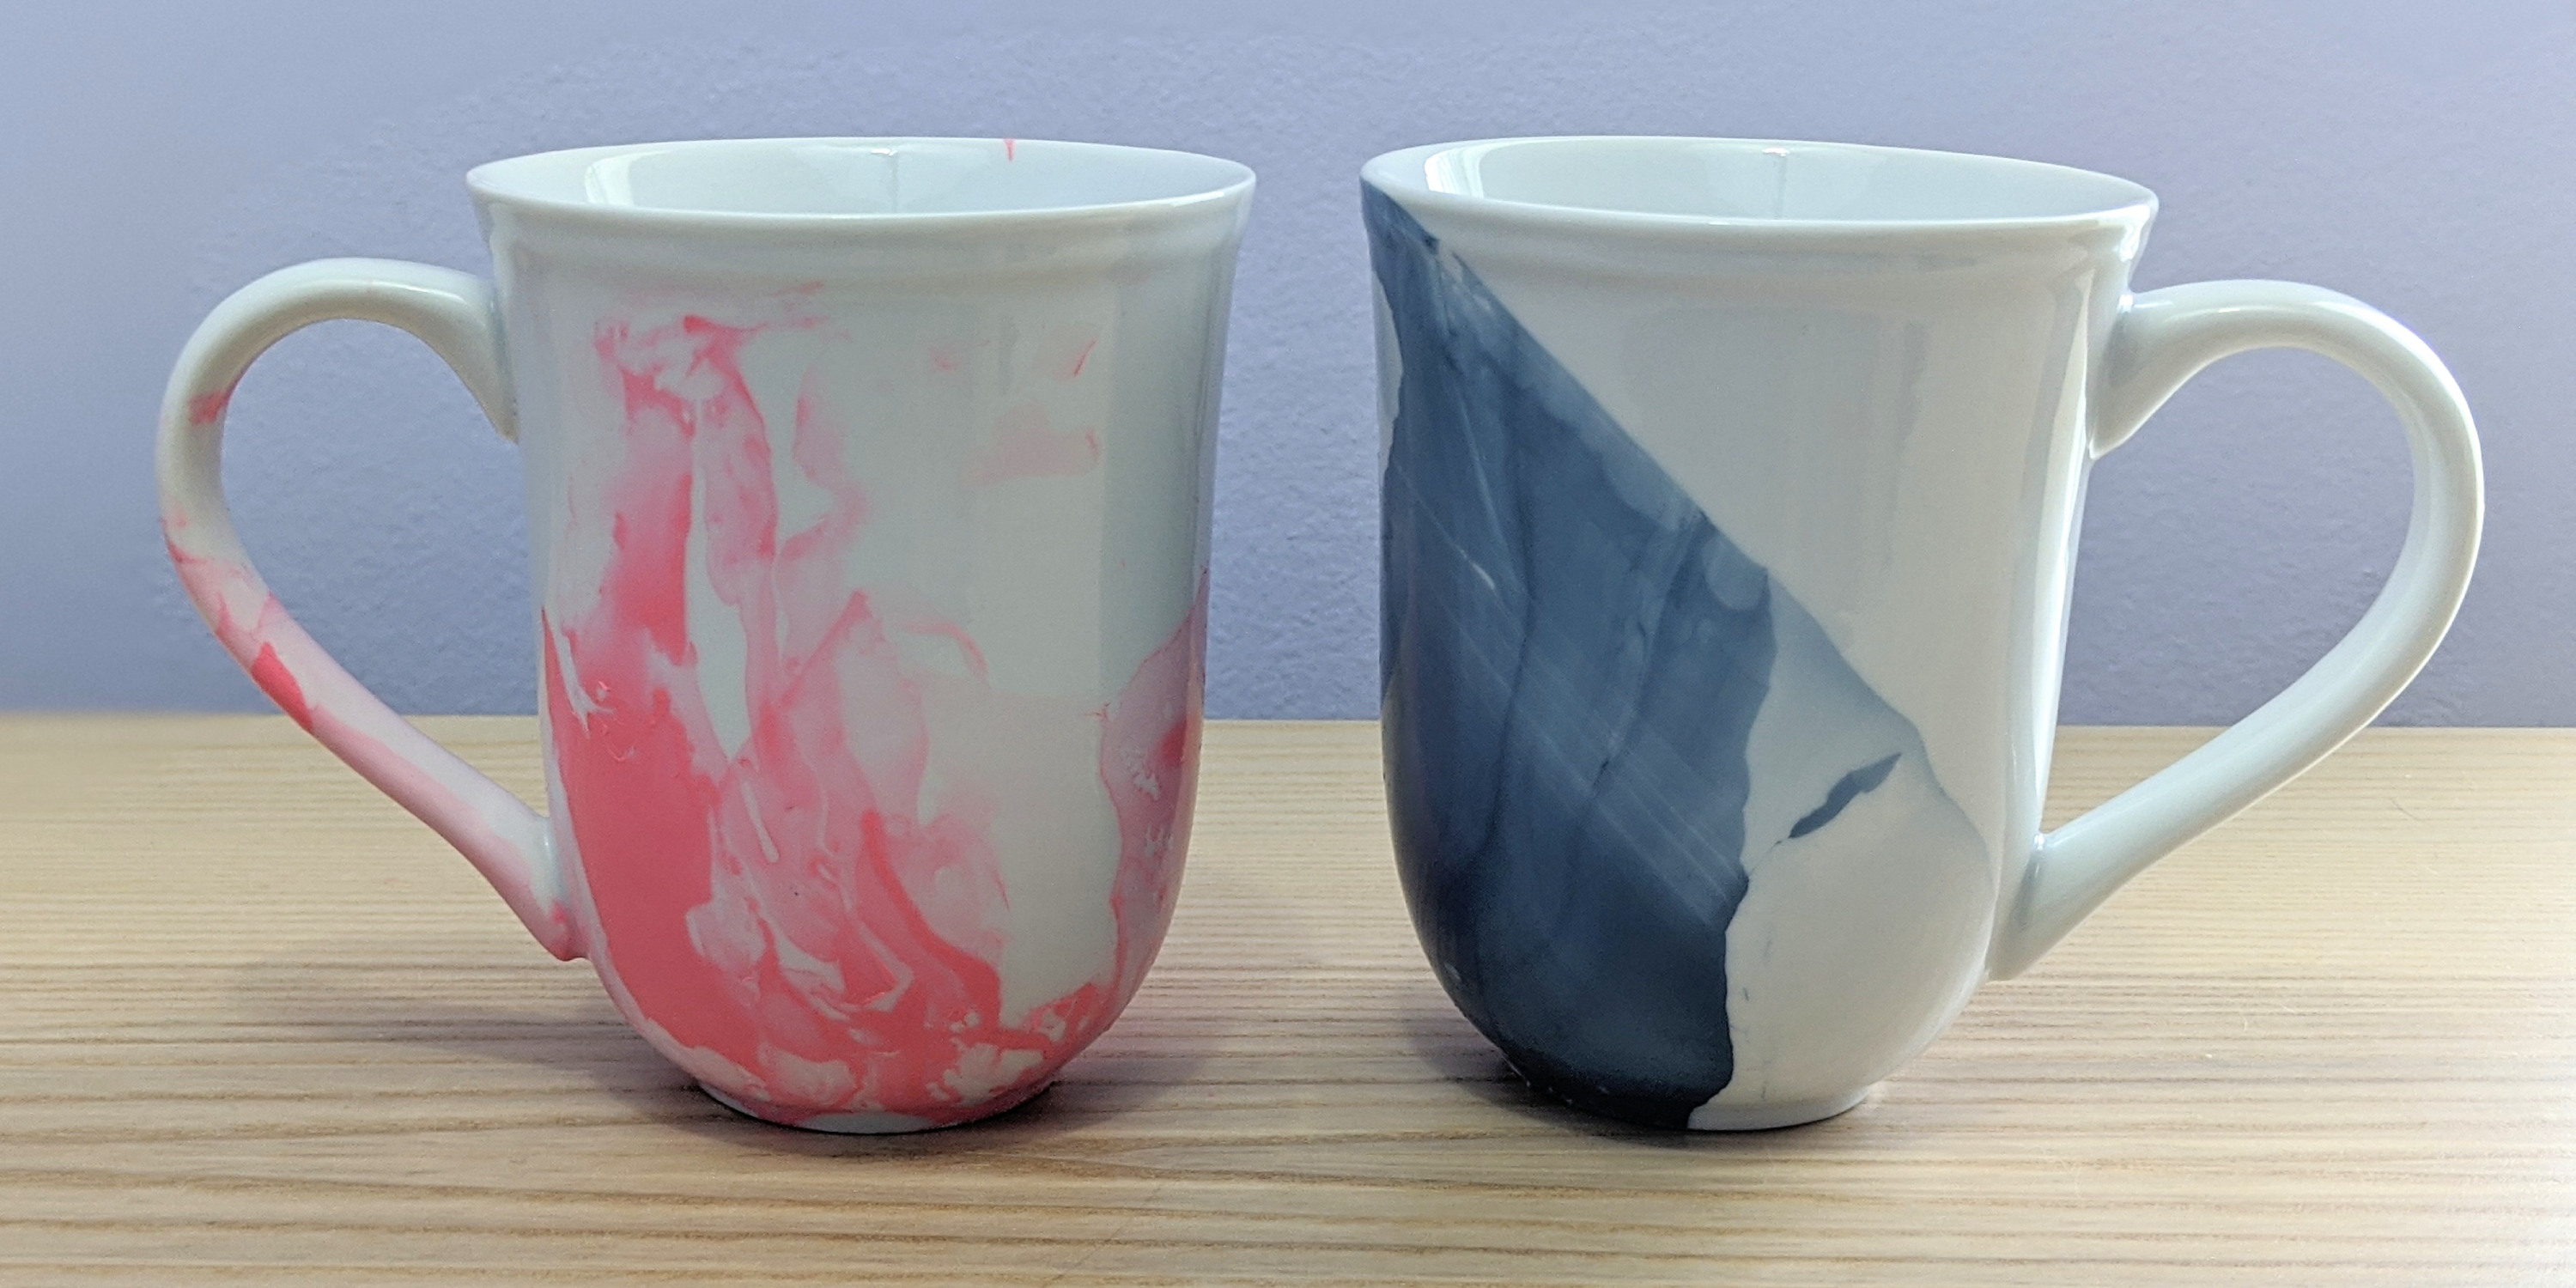
1. Marble Dipped Mugs
For this craft, you will need a mug, a container of warm water, nail polish, paper towel or parchment paper, and a cotton swab (Q-tip) or skewer.
Fill your container with warm water (use a container that you don’t mind getting dirty with nail polish). Take your nail polish and slowly pour close to the water. Make sure that you pour from the bottle and not the nail polish wand. The nail polish should spread out over the surface of the water. Quickly, take your mug and dip it into the design – make sure not to dip the rim of your cup where you would drink from. Take the mug out and put it onto the paper towel or parchment paper to dry. Be careful not to touch the paint or it may smear. Use nail polish remover to wipe away the design if you want to try again or clean up areas. You end up with a beautiful and unique design every time. Get creative and use this method to decorate mugs, coasters, plant pots, paper and more. Get the full instructions and extra tips at House of Hipster.

2. DIY Cereal Box Drawer Dividers
Here is an easy and resourceful way to organize your bathroom, kitchen and desk drawers using cereal boxes. In addition to cereal boxes, you can also use granola bar boxes, gummy snack boxes, etc.
For this project, you will measure the boxes inside the drawer to make sure they will fit and then cut them accordingly. Once cut, decorate the boxes with wrapping paper, washi tape, cardstock or any covering you prefer. For the full instructions, visit iHeartOrganizing. You can find even more ways to organize using cereal boxes from Kix Cereal.
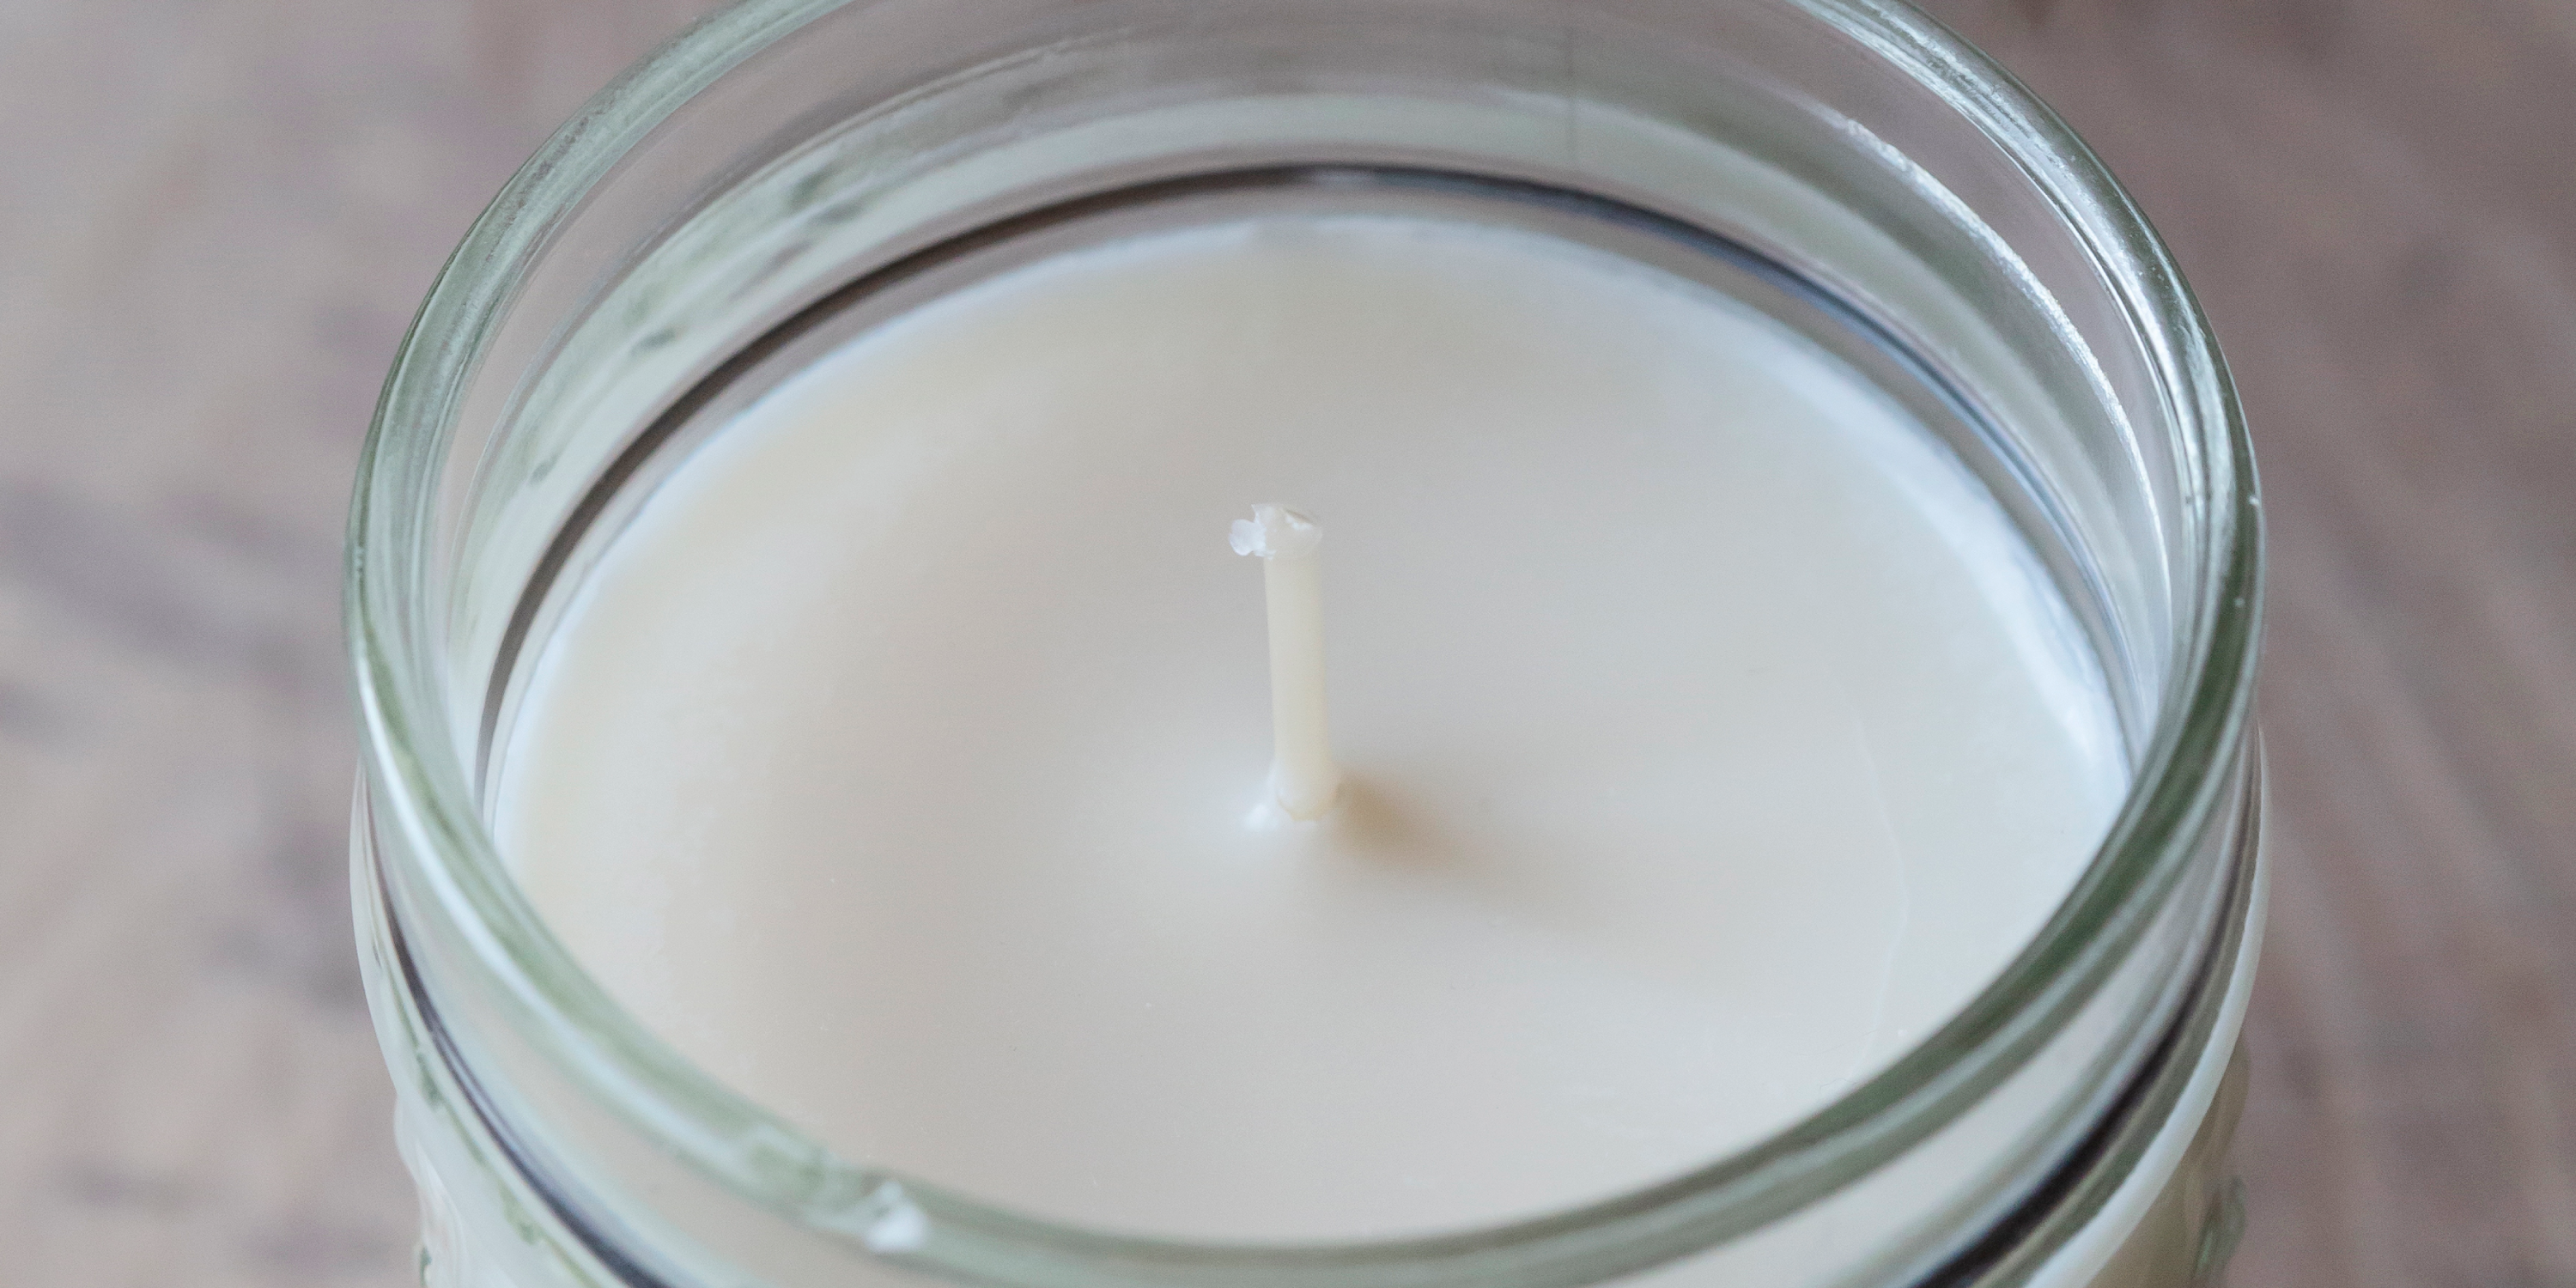
3. DIY Soy Candles
For this project, you will need a heat-proof container for your finished candle, soy wax, a long candle wick, fragrance or essential oils (for scented candles) and some kitchen tools. Optionally, use a melted crayon of your choice to add color to your candle.
First, make sure you keep your counters safe with newspaper or parchment paper. Measure the amount of soy wax that would fill your container, and then double that amount to know how much wax is needed. Place the wax in a double boiler and mix frequently until melted. Add your fragrance oil or essential oil to the melted wax. Take your candle wick and dip the end in the melted wax and stick it to the bottom of the heat-proof container. Hold the wick for a couple minutes until hardened. You can also use a glue gun or super glue to secure the candle wick if you prefer. The next step is to secure the wick with a clothespin or wrap the top of the wick around a pencil and letting the pencil sit across the top of the jar, to prevent burning your fingers, and pour in the wax. Let the candle sit for 4–6 hours to harden. Once hardened, cut your wick to be about a half inch long. Visit ProFlowers for full instructions and creative ways to enhance to your candle.